

In this article, we use so-called affiliate links. With every purchase through these links, we receive a commission from the merchant. All relevant referral links are marked with <icon/>. Learn more.
On the one hand, iSUPs have proven to be extremely robust: On the one hand, they can be pulled over rocks that are not too sharp (super whitewater suitability) with almost no danger, and children can even romp around on them on the beach (the perfect family board). However, the glued joints of older boards in particular remain a weak point and air can sometimes escape from the seams (welds). For this reason, modern boards are increasingly welded at the edges under temperature and pressure and not glued.
However, if the pressure on an old board decreases measurably within a few hours without the board having been taken out of the blazing sun and placed in a cool storage room, for example, this is a deceptive sign. The leaking seam on the SUP can sometimes be discovered in clear seawater, or you can find it by wetting the board along the seams with a solution of water and a few drops of washing-up liquid. Where small bubbles bubble up, you have to go for it. It is best to mark the leak(s) immediately with a waterproof felt-tip pen.
However, if it bubbles along the edge like in the whirl pool, the adhesive is usually brittle and the repair becomes a never-ending story. In such cases, the The way to a repair specialistwho can assess the situation. Two or three leaks, on the other hand, are by no means a reason to dispose of hazardous waste, but only a small challenge for the amateur repairer.
Material and tools for leaky seams
Almost all iSUPs are equipped with a Repair kit supplied. It usually contains one or more sufficiently large patches in a suitable colour. A suitable adhesive is also required for the repair. As our SUP boards are made of elastic PVC film, a "soft adhesive for PVC" is well suited. You can find this from well-known brands (UHU, Pattex) in any DIY store or online. A few drops of hand dishwashing liquid are used for leak detection. A multitool (the best known is probably the "Dremel") and a few pieces of sandpaper with 120 to 400 grit can be used for sanding.
New: The best repair for a leaking seam on the SUP
The problem with very small leaks at the seam is getting the adhesive into the gap. One option is to forcibly open the seam further until an opening several centimetres long is created. However, this is more of a major operation that only specialists should attempt. An attempt is therefore often made to seal the mini-leak with a patch. In the case of a small hole, caused by thorns for example, and on a straight surface, this can work well. However, a problem lurks at the edge: no matter how firmly you press the patch on, a "corner" remains where the glued layers overlap, a hair-thin gap into which the patch will never nestle - leaving a hair-thin air channel.

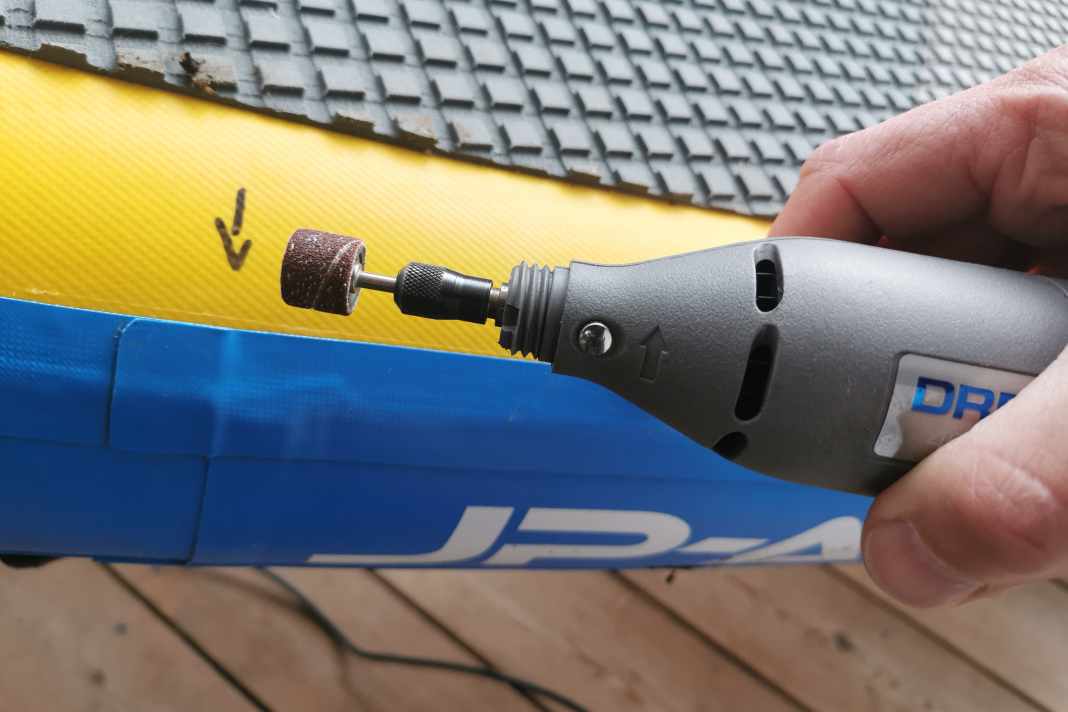
The trick shown here is to very carefully grind this angular transition flat. The pressed-on patch then lies seamlessly around the leaking area and - voilá !- our previous test repairs have already held tight for the second season. Sand carefully and clean the patch thoroughly - don't touch it with your fingers before pressing! The underside is protected from punctual pressure from the clamp when pressing with a piece of wood; the clamp or a smaller piece of wood presses directly onto the patch. As with all bonding, the strongest possible pressure shortly after application is more important than the pressing time. When gluing, pay attention to the temperature of the adhesive, usually between 15 and 25 degrees.
The 7 steps for repairing small leaks in the seam in summary
- Find and mark the leak on the inflated board with detergent and water
- Carefully sand the transition at the overlap flat, protecting the surrounding area with tape
- Cutting patches to size, round or oval
- Degrease patch and adhesive area with alcohol
- Apply adhesive evenly on both sides, observe drying time
- Apply the patch and immediately press down very firmly with your hand and fingers, especially at the edge
- Press firmly with a screw clamp, protect the opposite side with wood shims.
We wish you every success and many more seasons with your "problem board"!
Also interesting:

Stephan Gölnitz
Deputy Editor in Chief surf
Stephan Gölnitz comes from Bochum and had Holland as his home windsurfing territory for many years before moving to Munich in 1996 for the job of test editor at surf magazine. The materials engineering graduate worked as a surf instructor on the Ijsselmeer during his studies and competed for several seasons for the Essen sailing team in the Surfbundesliga and the Funboard Cup. He completed a traineeship at surf-Magazin in the test department and since then has actively accompanied almost all tests on the boom and for more than 10 years also as a photographer. Stephan has covered many thousands of test kilometers, mainly on Lake Garda and in Langebaan, but also in Egypt and Tobago. He gets his hands on over 100 new sails and boards every year as his company car. Privately, he prefers to surf with a foil on Lake Walchensee or “unfortunately far too rarely” in the waves. SUP is Stephan's second passion, which he pursued for several years at numerous SUP races. Today, he prefers to paddle on river tours with family or friends - even for several days.

